Sunday 26 August 2012

More adhesives but think I'be finally found the best for crafting

Watching Create and Craft TV I've noticed lots of the demonstrators using a glue in a bottle with red applicator for matting as layering so thought I'd try and track it down. It's called Collall and comes in the multipurpose one with the red lid, a PVA with a green lid, silicone adhesive and photo glue.

I went onto Crafters Companion site and brought the all purpose one for £2.99 (they had 4 for £10 but wanted to try it out first). I also got 3 PVA glues (as I use PVA a lot!) and also brought a new double sided adhesive runner as mine is nearly out and keeps catching. Crafters Companion have great postage prices (this was the main reason I didn't order it from Create ad Craft).

My order came the next day and I must say all adhesives are amazing! The adhesive tape runner is great as its so smooth to apply and doesn't clunk.

The glues are great as they have spreaders on the applicators. The only thing I found was when gluing patterned paper the all purpose glue got the paper a bit wet and showed the glue lines but this went when dry.

I defiantly know what glues I'm going to be using from now on (with pinflair for my silicone glue)

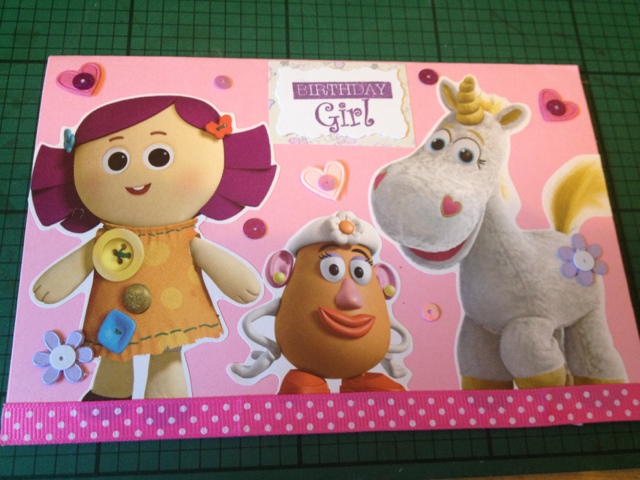
Photos of some of my bank holiday makes also shown below (using the above adhesives)

Friday 24 August 2012

Oh dear! Goodbye injured stamp :(

I was looking through my stamps earlier to make some room and found that two stamps had merged! Luckily they were two free gift stamps but I did like the Easter egg stamp. The stamp which melted into the egg stamp was part of a stamp set from a magazine and I really liked the stamp designs (mice and sewing things) but when I got them home found they were really floppy and jelly like. When I used them they were uneven and as they were so soft if you put pressure on them they squished the image and they were impossible to clean. I kept them on their protective sheet in my stamp box but they didn't cling and were forever falling out, hense why I found it merged into the egg stamp.

At least I made more room in my stamp box for the Christmas bauble stamps I ordered! Plus I did read the instructions on my See-Ds stamps and found out the yellow sponge thing in one of the sets wasn't packaging but....a stamping mat and now the stamps come out so much better!
The damaged Easter egg stamp (on the stamping mat I found!)


A stamp from the jelly like free stamp collection that attached the Easter egg stamp (they were clear but the ink couldn't even come off them)

The jelly like stamp from the side (See how mis-shaped it is.... thats how they were as soon as you took them off the sheet!)

Saturday 18 August 2012

Two more craft magazines!

I went to Tescos today to get my eyes tested and quickly grabbed Lets Make Cards and Crafts Beautiful before my appointment, then sent my Husband off with a list of bits we needed (he came back with the items plus a bag of chocolate buttons! He is worse than me!). 

I can't belive that on one of the hottest days so far this year I sat in the study (with the windows open and music blaring) and sat reading crafting magazines about Christmas...and then made a few Christmas cards!

I love these two magazines, as well as Cardmaking and Papercraft (which I subscribe to) and couldn't wait to get my hands on the Christmas goodies.

Lets Make Cards came with its usual huge stash of card making goodies including card blanks, chipboard and thinner die cut shapes, background papers and embellishments, all Christmas themed.

Crafts Beautiful came with a foil embossing kit with a Christmas theme and some Christmas tags.

Below are a few photos of the goodies. I will post some of the things I've made soon (only just came out of the study after being in there since about 6!)
Foil embossing kit with Crafts Beautiful which also came with some tags

Cards, ribbons, papers, die cuts, embellishments and gingerbread man stamp from Lets Make Cards


Close up of some of the embellishments from Lets Make Cards
The cute gingerbread man stamp from Lets Make Cards


Little metal stocking embellishments
My favourite paper from the kit 


Quick little make - box using pretty patterned paper and new paper trimmer

This is a little box which I made using the papers from a kit I got last month. I made it really to test out my new Purple Cow trimmer and guillotine. It is currently housing the Christmas embellishments from Let's Make Cards. (the celotape is not attached to the box, just used it in the picture to show the edging round the bottom of the box

Update on my bunting from Crafty Creations #CCbox2

Sizzix machine came out this morning and after cutting fabric in it for the first time I've managed to embellish the pink gingham flag!

Found out its easier to cut fabric if you also put a bit of card over the back of the material when using the sizzix big shot as it give a better cut

Wednesday 15 August 2012

First make with my Crafty Creatives Box Using The Wooden Bunting #CCbox2


While making my nautical bracelet I had an idea for the wooden bunting triangles. I have some scraps of Cath Kidston material and some gingham scraps so I decided to cover my triangles in material and once dry will use my Marianne Design cupcake dies or flower dies to put material or paper designs on the front.

 
To begin with I took one triangle and put a layer of Copydex on one side of the triangle
 
Next I put the material over the glued triangle and smoothed the material out. It may be worth ironing creased material first to ensure a smooth finish. Be prepared to get sticky fingers as the glue will come through a little.
 I then turned the triangle over and glued round the edges
To ensure smooth corners I tucked each corner in and then applied more glue. As you can see this was a scrap bit of material but you could cut your material so it has straight lines.
Next I folded in the sides and smoothed down (again its very messy so be warned and have a cloth on standby to clean off any glue on your fingers so you don't get it everywhere)
And ta-da, 1 completed material covered triangle


I did two more triangles in different material (the flower material is Cath Kidston) and left to dry. 

At the weekend I'll get the Sizzix out and put a design on them. As you can see the triangles had holes drilled in so they could be hung and once the glue has dried I will put the material though to make the holes again.

Very pleased with these as I had a moment of inspiration! Not sure where they will go but they look very pretty


Whoops! Broke my needle making my CC Kit! #CCbox2

Luckily you can use glue to make this bracelet instead! Now to wait until it dries (I will remove the other half of the needle once dry but it's holding the cord in place)

My First Crafty Creatives Box Has Arrived! #CCbox2

 
My First Crafty Creatives Box arrived this morning. It wasn't waiting at the post office as first thought but my postman dropped it off just before 10.30 this morning. 

When I opened the box I first through it may have been a gingham theme due to the paper but on pealing back the paper found a nautical theme waiting for me.
The contents of the box is shown in the below photo (my car keys didn't come in the box obviously but due to today being my day off and being half way through cleaning the kitchen I didn't have much room to show off the contents of the box).
 
 
The contents of this box included:
  • CC Kit - You get a kit each month with an item you can make from start to finish. This month the kit makes a nautical bracelet. I will post mine once made but at the moment the rope is drying out in my study after sealing with with PVA glue (so it doesn't fray).
  • Driftwood - Something added to the box as a bit of a challenge, suggestions included making a brooch, boat, paint it or carve it. I got a few small pieces but other people may have got a larger pice. I'm thinking maybe adding it to a card...
  • 2 Coconut shell fish buttons - these are really pretty and have so many ideas for these
  • Boat wheel pendant
  • Large wooden bunting flags - thinking of covering them in pink gingham fabric and using my Sizzix machine to punch out some cupcakes to glue on
  • 3 porceline fish beads - these are so pretty, I'm not sure what to do with them but I don't want to hide them away!
  • Coloured paper string
  • Hessian material - could possibly add this onto the bunting. I've only ever known hessian bags but will find something to make with this. It's a lovely texture. 
  • Selection of red, white and blue buttons - I love buttons!!! Can't get enough of them and sticking them on cards.
  • String of glass pearls - I got an aqua colour and currently have these wrapped 5 times round my wrist (I was just playing around with them). Love the colour of these and thinking of making bracelets with these.
  • 3 Sheets of nautical paper - great for card making and using as a background.
  • 5 starfish pendants - possible thinking on adding these onto my nautical bracelet some how.
  • Flag ribbon and blank tags - love this as you can never have too much ribbon
Envelope holding the 5 little starfish pendants

Boat Wheel Pendant

Fish buttons
Fish beads
My thoughts on my first ever Crafty Creatives box? I LOVE IT! It's great if you stick to the same old crafting themes and fancy trying new things. I love all the stuff in the box but wouldn't have brought any of it as I'd have no idea how to use it but this box makes you want to try things out. It's a bit like Ready Steady Cook! You are presented with a box of goodies and have to put together something magical out of them and the only limitation is your imagination!

I love the idea of this box and the amount of thought that goes into it. Can't wait for future boxes...now hurry up PVA glue and dry so I can make my bracelet

UPDATE: I forgot to mention the lovely card that came with the box which has a picture of a lighthouse on the front and the list of items on the back (so many goodies!)

Tuesday 14 August 2012

Toni & Guy - Hair Meets Wardrobe

The below post is about products which I've been given to review as a BzzAgent.

I was sent a box full of Toni & Guy products to review and test out by BuzzAgent. I've used Toni & Guy products before but about 10 years ago. I first tried the brand when mu friend paid for a blow dry at the Toni & Guy salon for my birthday before going to see Westlife at Wembley Area. The smell of the products were so lovely and after than remember buying shampoo and condition from Toni & Guy. At that time is came in red and white packaging in foil bags. These were great for getting all of the product out of the bottle.

I then changed hair care brands and hadn't used Toni & Guy products since. Not for any real reason, just the fact I always change shampoos.

When I heard about the new range from Toni & Guy I couldn't wait to try them.

The new products come under 4 categories:
Casual
Classic
Glamour
Creative

The new range is all about dressing from your hair down and accessorise using your hair.

The box arrived with:
Heat Protection Mist - always need this and love the trigger spray as its so much easier to apply
Curl Defining Oil - Can't wait to try this as I have really this hair with a natural kink/wave in it
Gloss Serum - I have really thick frizzy hair so this will defiantly help tame my hair
Sculpting Power - never heard of anything like this before but it says it mattifys, volumises and gives texture . It's a little shaker of powder and can't wait to give it a try for a new look
Sea Spray Texturising Spray - I've used Charles Worthington sea spray before which was old but felt sticky so hoping this isn't.

I'll be giving the items a go and will post results here.

If you want to try out the new Toni & Guy products head on down to Boots.

You can follow Toni & Guy on Twitter:
@Hair_Wardrobe
Facebook:
HairMeetWardrobe
YouTube:
YouTube.com/HairMeetWardrobe
www.hairmeetwardrobe.com

Recent Card Makes

Last week it was my Dads birthday and parents wedding anniversary (on the same day so it's very easy to remember!)

I forgot to photograph them (although I will try to remember when I go around there on Friday) but did remember to take a photo of the card I made for my sister for my Dad (she told me what she wanted and I put it together)

It was made using Boofle toppers and. ribbon I got as a free gift with a craft magazine.


I also made my Dad some superhero cupcakes as he love superheroes from DC and Marvel. It was my first attempt at making these and was very pleased with the finished items! Also very pleased with my 99p cupcake holder so the decorations didn't get ruined.

Tomorrow I should hopefully be able to post about my first Crafty Creatives box! A monthly craft box for £12.95 (I think) a bit similar to beauty boxes but with craft items and a kit to make a full item. Can't wait to see the theme!

Friday 10 August 2012

Busy Busy Busy!

Just got in from my parents after dinner and have set to work packaging up cards for my friends charity tea party for St Francis Hospice.

Think it's nearly bedtime! Got two hedgehogs to make tomorrow and the arrival of the 3D TV (hence why I'm in the study now so I can make my hedgehogs tomorrow while watching TV if it arrives early!)

I will leave you with a picture of some of the cards. The 'handmade' cards are from Moo Cards and have my details on the back. They're really handy for price labels too! If you haven't shopped at Moo before you can get 15% off by using the code 2RB2CK at moo.com or search around for any other deals (mine were free for a pack of 100, and I only paid postage)

Blog Archive