Friday, 27 December 2013

Craft Room Revamp

My craft room/study use to be my husbands music room but now he used the second bedroom however my desk still had 2 computer monitors and a sound mixer on so crafting area was limited. The computers weren't used! However....yesterday Lee finally got round to sorting it out so I could set up my Cricut Mini and have room for my sewing machine etc. 
This is it currently but I'm waiting on my Spectrum Noir storage trays which will go where the blue box is (my pens are currently in the black rolls on top of the white drawers) and I'm also going to get a shelf just under where the two pieces of white paper are on the wall (they're my cricut mini guidance sheets)

I just got back from Hobbycraft (popped in after work) and managed to buy more Spectrum Noir pens (original style) for £3.50 for a pack of 6! So I now have all my core pens plus two of the larger packs meaning I now have 120 pens! Just the last two big packs left to get (birthday list!)

I'm off now to put all my Hobbycraft goodies away then start on dinner. 

Welcome home Cricut Mini!

I had such a lovely Christmas Day. The homemade crackers were brilliant as everyone got useable gifts not things that ended up in the bin. The crackers also cracked perfectly! My Dad did the jokes inside each cracker so it was nice not to have the same jokes you have each year and they were suited to each person. 

Inside all the crackers I filled (ie all but mine) I put a Molton Brown minature plus a handmade item. Mum had a keyring with their dog on, Dad got cufflinks with one of his pictures he had taken of a cat woman statue, Lee got cufflinks with his tattoo design on (treble clef and heartbeat) and my sister got earrings I'd made. In my cracker my Mum put a Revlon nail art nail varnish duo.

Also I recieved a Cricut Mini from my parents! I've wanted one for ages but haven't had the room and felt they were too expensive to justify buying one or someone buying one for me but you have to love Amazon Black Friday. I did know I was getting it so purchased a few cartridges I wanted if I could find them at a good price on eBay including Disney Dreams Come True and I made this quickly when I got home on Christmas Day before bed (we were up by 5.45am, at Mother-in-laws by 7.30, then at my parents by 12, home at 8.30pm)


If it doesn't move, it gets personalised with vinyl!

I think I may have a dodgy cricut blade as the cuts aren't that crisp but I have been playing with some vinyl and personalised my hard plastic beaker using Cricut Disney - Mickey Font


Tuesday, 24 December 2013

Merry Christmas!

Hope you all have a lovely Christmas and get lots of crafty goodies! I know one present in getting tomorrow and sooooio excited! 


Saturday, 21 December 2013

Christmas Crackers

After buying the Tonic cracker die in August and having issues with the paper it came with (it kept tearing while putting the crackers together) I decided to just make my crackers from scratch myself. I used Centura pearl card stock for the main cracker and used the template from Simply Homemade magazine to draw then out the design. I added a wrap of silver adorable scorable plus some DoCraft sticky back fabric. I added cracker snaps from Hobbycraft, personalised the crackers with names and sprayed the whole thing with Crafters Companion Spray and Sparkle. 

I've not completely done them up yet as my Dad is doing the jokes for them and my Mum is putting a present in my cracker so I don't know what it is. Each cracker has a handmade hat, handmade personalised gift and another little gift. To stop the presents falling out or going missing I've wrapped them in a little parcel paper (I can't say what they are or it will spoil the surprise)

I'm really please with how these have come out and hope everyone enjoys them. 

Merry Christmas

My Saturday Morning

Moma porridge while making the Christmas crackers and listening to Christmas songs on Spotify


Friday, 20 December 2013

My Bauble in Cardmaking & Papercraft Magazine

Firstly sorry for the blog silence, I did blog but the posts didn't upload from last week. This post is from Monday (16th December)

You may remember my felt bauble from a few weeks ago. Well I sent a picture of it to Cardmaking & Papercraft Magazine as I got the inspiration from an up-cycling feature. Today after a hectic day at work I found my copy of the magazine had arrived and had a quick flick through to see how they used the free gifts when I saw my bauble! It was 'editors favourite'. I'm so surprised and happy

Now I really ought to start preparing dinner (currently leaning against kitchen sink with a half made coffee!)

Final Christmas Cards for this Year

This year I've made around 200 Christmas cards and these are the last 50 which I made for my parents company. 

I used Craft Artist to design the card and printed them onto a variety of different types of photo paper, attached to a card (all of which I scored on my Ultimate Pro) and also added an insert. We weren't sure if the gold would come out very good on the printer but it looked really great on both the glossy and mid gloss paper.

I'm really please on how these came out.

Sunday, 8 December 2013

Christmas and Birthday Card in One

My sister asked me earlier today if I could make a birthday and Christmas card in one for her friend whos birthday is a few days before Christmas so I thought I'd have a go. I didn't want it to look too strange but found a great embelishment on the Fizzy Moon Home for Christmas Digikit on Craft Artist. The embellishment has the Fizzy Moon bear hanging a banner while wearing Christmas clothing and I added 'Happy Birthday' to the banner.

Once printed I'm going to be adding some glitter to the santa hat and some glossy accents to the balloons.

I love using Craft Artist to make cards. I didn't really like digi crafting when I began crafting but now find it's great for making quick cards, making cards on behalf of other people so you can show them options, and if you just want to play around without getting messy or wasting your craft stash if your not sure what you want.

Tuesday, 3 December 2013

Crafty Creatives Christmas Box

Recently I've had an awful chest infection which seems to have gone on forever, but I got something lovely in the post last week....the Crafty Creatives Christmas Box! I'd ordered this back in September for £20 plus p&p - although I stopped my Crafty Creatives subscription this was a one off box and I thought I'd treat myself as I love Christmas crafting.

The box arrived Wednesday morning while I waited for my oven to be installed (after 6 weeks without an oven) and was so excited when my Mum brought in my post (she came round to help when the oven was delivered). The box came in a red bag instead of the normal pink bag and was packed with goodies - so much so that you couldn't get it back in the box to shut it properly!

Here is a Vine or the unpacking (I hope this works ok, I've never tried adding these before):

The box included:
Wooden snowflakes
Tree shaped beads
Christmas cameo
Stix2 Wrapping Seals (see my post http://www.saraleighuk.blogspot.co.uk/2013/11/christmas-wrapping-and-using-some-bits.html for a review of these)
Three cardboard cones which fitted together like a Christmas tree (like the Decopatch models)
Christmas tree stickers
Christmas papers
Card blanks and envelopes
Mini coloured bells
2 gift boxes to cut and assemble (assembled below

The contents of the box also included three kits. I don't usually like the kits but these looked quite good including lip scrub (with 5 little tubs), a felt decoration and a beaded bauble.

I've not made the lip scrub yet but ended up using the items from the felt decoration and beaded bauble kits in other ways. I used the felt from the felt decoration kit, along with the two small wreath rings to make wreaths to go round the bottom of candles. I'm a bit addicted to die cutting small flowers out of felt to decorate things with at the moment so I covered the wreaths with wool (wrapping it round) and then layered the ring up with felt flowers and adding some glitter. I used the felt from the kit as well as some of my own. I then did the same to the Christmas tree/cardboard cones.


With the bauble I put the beads in my stash and decorated the bauble with some glittered snowflake stickers (our Christmas tree is black with black, white and silver decorations so decorated it in this way so it stays in keeping with our theme).


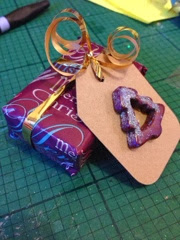
With the Christmas tree beads I coloured them with my Spectrum Noir pens to make them red and deep purple to stick with my wrapping theme and then glittered them up. I've used them on some of my Christmas tags and will be using them on Christmas crackers too


Monday, 2 December 2013

Christmas Card - A Different Type Of Card For Me

This is a different type of card for me. I used glossy accents for the first time and used this cheeky image from Kenny K. 

I was having a look at some blogs recently and found some lovely digi stamps including some from Kenny K so had a look and found this image which I really liked and thought it would be perfect for my husbands Christmas card. I coloured it with Spectrum Noirs and added glossy accents to the bow, lips and eyes as well as on the 'to my husband' sentiment, scroll and bow in the bottom right corner.

I was so excited to give this card to my husband and he really liked it (it's the first card up in our flat lol) 


I apologise for the photo of the card on the radiator. My craft room is currently Christmas present central and I cannot get to the desk for all the presents, wrapping things and piles of Christmas cards to send out.

I've entered this card into the Through the Purple Haze Christmas Challenge which you can visit by clicking here