Saturday, 30 November 2013

Christmas Wrapping - and using some bits from #ccchristmas

I decided how I was going to wrap my Christmas presents for this Christmas in Decrmber last year while finishing off the Disney Princess Christmas paper (it took nearly three years to finish off the Disney rolls I'd brought from Costco....hubby didn't seem that impressed when I arrived home with them...). So this year I was going to wrap all my presents in parcel paper, add stamps and ribbon but after wrapping one I found the tape didn't want to stick (unless I used lots of it) so I did a few parcels this way and sent Lee to pick up some nice paper from Aldi (by nice I mean modern and not too colourful) and he came back with two lovely rolls. I also had to wrap my sisters huge parcel so normal wrapping paper was much easier. I added curling ribbon and some handmade tags. On some I used the tree beads from Crafty Creatives Christmas Box and on others used Christmas stamps from Creative Stamping magazine (I've never brought this magazine but loved the stamps).


I also tried out the Stix2 wrapping seals that came with the Crafty Creatives Christmas box. These are adhesive discs to use instead of tape. They are really easy to use and having tried them on numerous shapes and sizes of presents I found they work best on small to medium sized parcels and ones which are square and firm as you need to press them on to ensure they give a firm seal. On larger presents and odd shaped ones I went back to using tape but these do definitely speed up wrapping 
The only downside to these is that the sheets are clear (as well as the seals) so if you put them down its a bit of a challenge to find them (I had four sheets on the go at one point). Also it's hard to see if you've used a sheet up, you have to feel for them or try to catch the light on them to see if there are any left. 
I wouldn't go out of my way to buy these but they were a nice addition in the Crafty Creatives Christmas Box.

Friday, 29 November 2013

Girly Birthday Card

I've been a bit quiet recently due to a chest infection which I still have but thought I'd post some cards which I made recently. I'm loving my new corner rounder (as you can see) and think it adds a whole new dimension to the cards. 

This card was made using Panda Paws backing card (I used it for the backing and the topper was actually from the background card too!). The sentiment and lacy pink card was from Hunkydory (the spring kit I believe). 


This card was used using toppers and backing card from Kanban Sugar Buttons. It's such a shame Kanban are no more, I love their toppers. 

The pink card and button card are glittered so this card really sparkles.

I'm going back to coughing and knitting now. Have a great weekend

Wednesday, 20 November 2013

Christmas Wreath Making With Women's Weekly and Hobbycraft

On 20th November I went to a workshop arranged by Woman's Weekly and Hobbycraft to make a Christmas Wreath. I'd seen the workshop on Facebook and booked tickets for my Mum and I.

I already have two wreaths but wanted to make my own and thought this sounded a great idea for £10. 

I arrived at Chelmsford Hobbycraft with my Mum and we found the workshop was going on upstairs so we made our way up. We were joined by two ladies from Woman's Weekly, one being Lifestyle Editor Jayne Marsden, two members of Hobbycraft and another 4 people who had booked onto to workshop. 

We were supplied with tea and biscuits while we crafted and each made our own green wreath, being shown how to add the different elements (lots of wire twisting).

We had a lovely time talking about Woman's Weekly and crafts we like and if we would like somewhere to share our makes online. The ladies at the workshop were into lots of different crafts including one lady who was currently doing a jewellery course. I explained that I liked lots of crafts but didn't really like projects where you can't do anything with them once finished, I like papercrafts where you can use them in someway as I don't have anywhere to store them and never know where to put things.


I really enjoyed making my wreath and it smells lovely with dried orange and cinnamon. My Mums was quite full in depth as she mainly used red berries on hers and I suggested she could use it as a ring for a large candle to make it a centre piece for the Christmas table which she thought was a great idea and maybe adding satsumas pierced with cloves 

The great thing about attacking the elements onto the wreath with wire means that we can change it whenever we want to. 

I've never been to a craft demonstration or workshop before but really enjoyed this one as we could do what we wanted and didn't just have to do what they said. 

Once we finished we all posed for a photo with our wreaths (keep a look out for me on the Woman's Weekly Blog.) I then went off to spend my vouchers we got for taking part. I brought a few bits I'd had my eye on but which weren't in my Christmas list - I brought liquid pearls (in a white, silver and gold), corner rounder punch and decoupatch glue. I did want to get glossy accents but they had run out so my Mums going to look for it when she goes shopping in there for my Christmas presents with the 20% voucher we each got. 


Christmas Decorations Using Felt Flowers


I've got quite a lot of felt and had this idea while laying in bed recovering from a migraine (the part where I think my head feels fine but am scared to move incase my migraine is just pretending it's gone)

I absolutely love cutting fabric and felt on my Sizzix Big Shot using the bigz dies and had a polystyrene ball from the Crafty Creatives birthday box still left over. 

The things I used to make the flower ball were:
Three colours of felt 
Polystyrene ball (mine had been drawn on when I was contemplating another project)
Red satin ribbon (5mm wide)
Sizzix Bigz Flower Layer #10 die and my BigShot
Silver glitter glue
Silicone glue 

To begin with I used the Sizzix Bigz Flower Layer #10 die and cut two large flower shapes from red felt (if you dont have a die like this you can cut one by hand, its only to cover the top and bottom of the ball and wont really be seen). I then cut lots of the small flowers from the die. I cut around 100 flowers from the felt in three colours(cutting 5 at a time...got to love Bigz dies) and put these to the side. You dont need 100 but I wanted enough for other projects. 
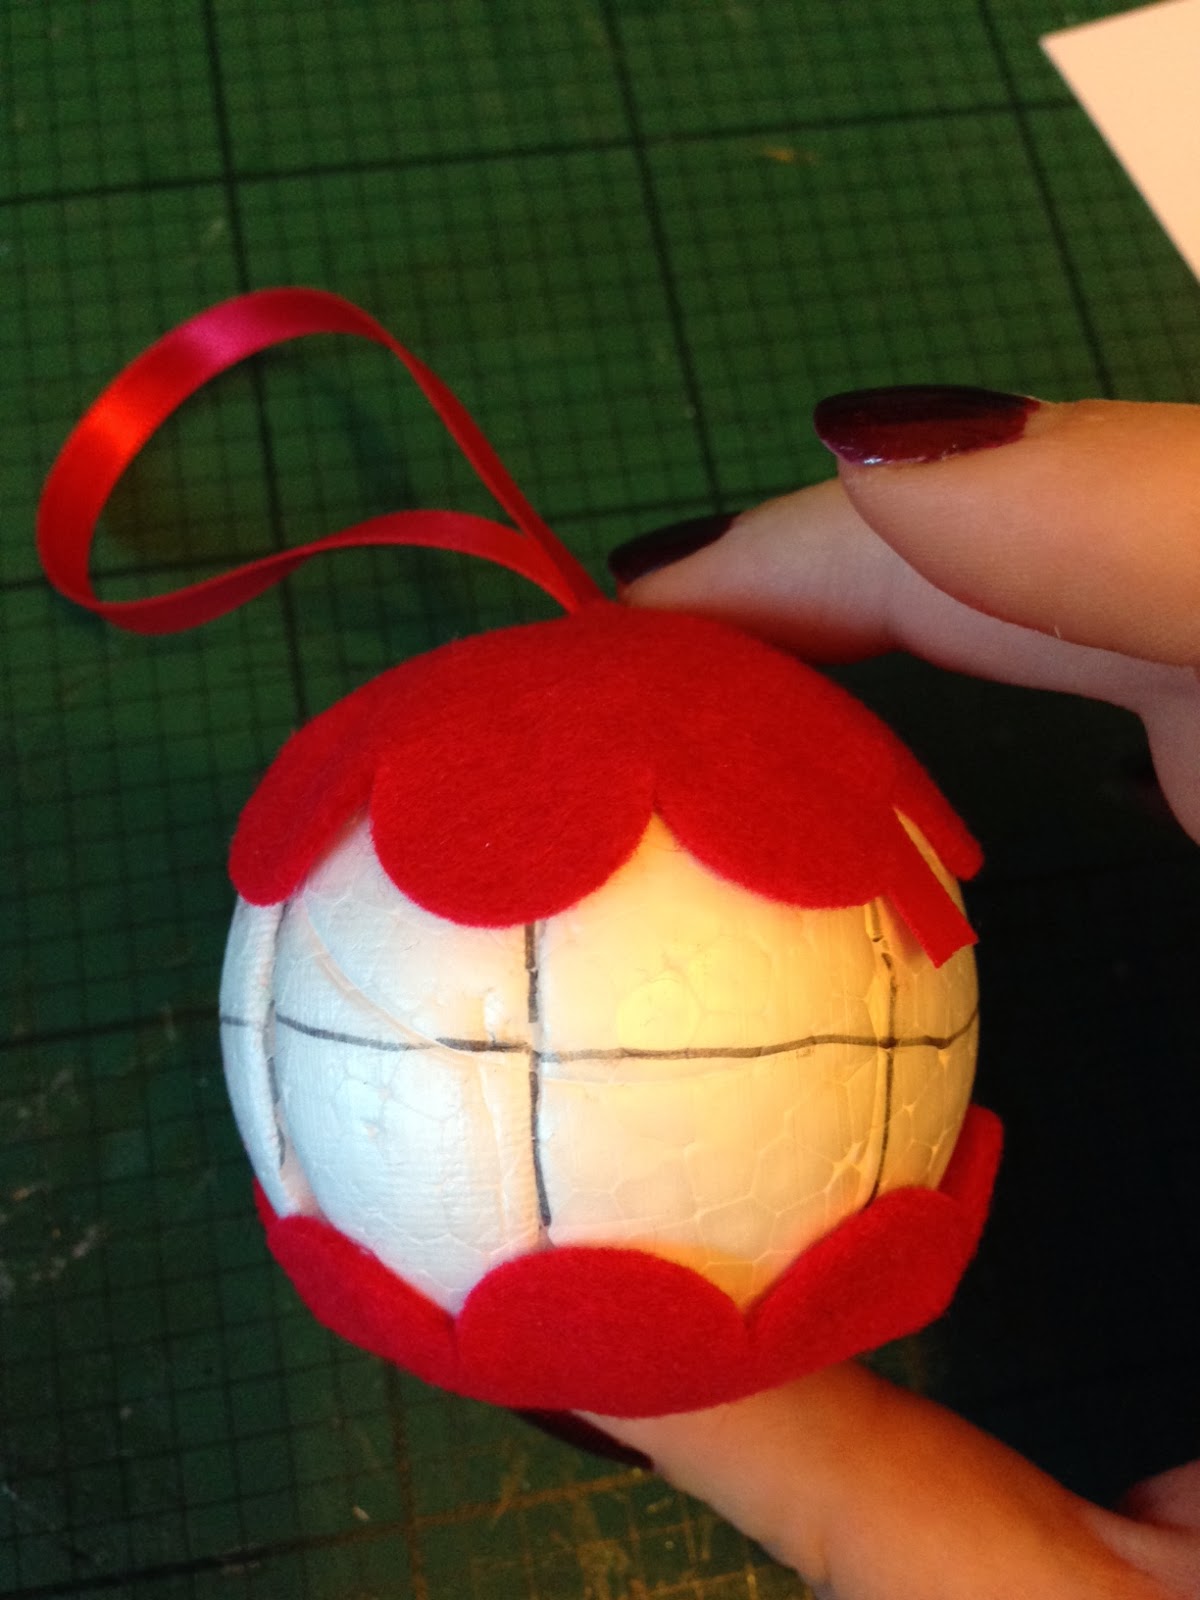
Take one large flower and cut a slit in the middle as wide as your ribbon then thread the two ends of your ribbon through the slit so you have a loop one side. Glue the two loose ends to the felt.
Next glue the flower with the ribnon to the top of your polystyrene ball (I used silicone glue for a firm hold) and place the other large flower on the bottom. The flower shape easily moulds round the ball due to the petals. 
Next cover the ball with your small flowers again I used silicone glue, and I started on the middle which didnt have any felt on, built this up and then covered the rest of the ball. I found it was best to randomly dot glueon the ball, add the flowers then work on the gaps inbetween. If you also glue just the centre you get a more 3D look to the flowers.

You can stop here but I then added some glitter glue to the centre of each flower (that was showing). To do this I put my flower ball in a small cup so I could glitter one side without touching it, left it to dry, turned the ball round and glittered the other side.
I got so enthusiasic about covering the ball with flowers that I did it to the woodern hearts I got free with Cardmaking and Papercraft magazine. This would be great on the front of a card and the recipient can then hang it on their tree.

Youcould also use just one colour felt to fit in with your theme or leave off the ribbon, add a wooden stick/rod and put it in a little bucket or pot for a table decoration (which could be used all year round)


Tuesday, 19 November 2013

Crafty Birthday Card

Now this is kind of spooky...I made the below card at the weekend as a break from Christmas card making and today I've seen Polkadoodles Digi Choosday Challenge is to make a craft related card!

I love the Emma Canning Digis and brought her CD back in August from Polkadoodles and loved the digi I've used in this card as it has a Sizzix Big Shot style die cutting machine in. I coloured it in Spectrum Noirs and framed it using a frame made die cut from foil takeaway tray lids (see one of my previous posts). I used similar dies to the one in the digi to bring it all together then I used felt flowers from Craft Artist as embellishments. 

Back to Christmas crafts now for me - can't wait for the Christmas Wreath making event at Hobbycraft tomorrow. I'll post a picture of our finished wreaths once they're done (I booked tickets for my Mum and I and as we have similar tastes they'll probably be very similar) 

Love Robbins...

I made this card using the toppers and background 'Love Robins...' card from Hunkydory and added a bit of texture with an embossed foil lid (see on of my previous posts) with the embossing folder from Crafters Inspiration Christmas 2013 edition.

The camera didn't pick it up well but the sentiment in the bottom right says 'merry Christmas' 

Saturday, 16 November 2013

Reindeer Friends

I made this card with the Reindeer Friends topper and background sheet from Hunkydory along with one of the sentiments I die cut using the foil lids. The sentiment is from the Tonic cracker set